What Are The Best Practices In Working With Flutter PUSH Notifications?
Working with push notifications in Flutter can be tricky if you don’t know the key points. Firebase Cloud Messaging (FCM) is the primary tool that helps you integrate notifications into your applications on Flutter. This article was written by Yurii Hrebeniuk, our top expert in Flutter PUSH notifications. Below, let’s look at five practical tips for setting up and working with push notifications in your project.
Install and configure the necessary packages
To get started, you will need two basic packages:
- firebase_core
- firebase_messaging
These provide the application’s communication with Firebase. After installing the packages, go to the Firebase Console, create a new project, and configure it for your app. It is important to properly configure Android and iOS platforms so that push notifications work correctly on all devices.
Obtaining and saving a user token
Each user of the app must receive a unique token so the server can send notifications to them. Use the following command:
- FirebaseMessaging.instance.getToken()
This token should be saved to the database for future use on the backend side. This will allow you to accurately identify the user when sending push notifications. Without the saved token, sending notifications will become impossible.
Handling notifications in different application states
Your application can be in three different states:
- foreground
- background
- terminated
When an application is in the background or terminated state, notifications will be displayed in the device’s “curtain”. However, if the application is active (foreground), the notification will not be visible by default. For this case, you can use the flutter_local_notifications package to display notifications even when the app is active. This is useful if you need to get the user’s attention immediately.
Additional data in notifications
In a push notification, besides the header and text, you can pass additional data in the data field. This data can be used to perform more complex actions such as:
- redirect to a specific screen
- retrieve additional data by identifier
This approach gives the developer more flexibility when working with notifications.
Handling events from notifications
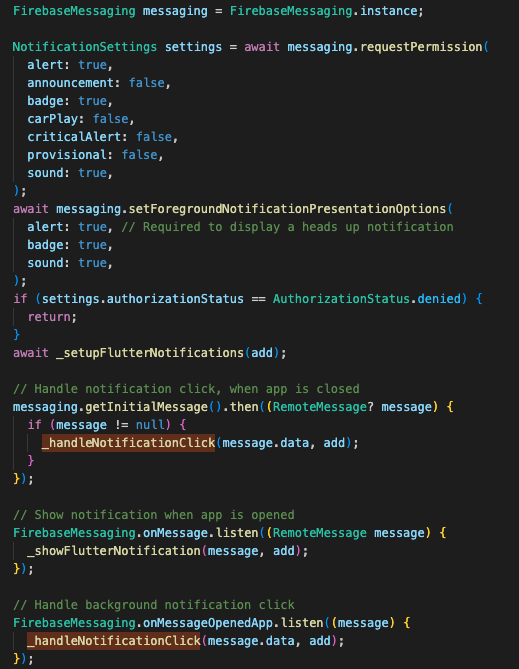
Flutter provides three events for handling push notifications:
- getInitialMessage: triggers when a push notification is pushed if the application has not been opened.
- onMessage: triggers when a notification is received when the application is active.
- onMessageOpenedApp: triggers if the user opened the notification from the “curtain”.
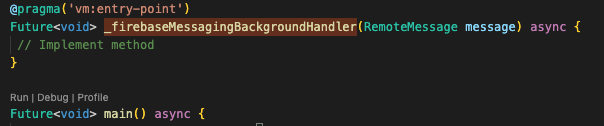
However, if the user simply swipes the notification, these handlers will not trigger. To handle notifications in the background, you need to use FirebaseMessaging.onBackgroundMessage.It is important that the callback function that handles the notification is annotated as:
- @pragma(‘vm:entry-point’)
And it must be implemented outside of the main() method.
Conclusion
Push notifications are a powerful tool for engaging with users, and implementing them intelligently in Flutter via Firebase Cloud Messaging makes it easy. By following these five tips, you can avoid common issues and create a robust notification system for your application.
![]()
Subscribe to us


